Most of my websites are built with modular content blocks. It just makes sense: clients can easily rearrange content and create new pages.
Kirby’s Blocks Field is great for that. Ever since the preview: fields option, it’s my favourite way to set up modular Kirby websites. It’s so easy to add a new block when you don’t have to worry about the Panel preview (maybe I just suck at Vue.js).
While I often have to use Modules for more complex setups, the Blocks Field is perfect for simple modular content. Here’s how I set it up.
The Blocks Field
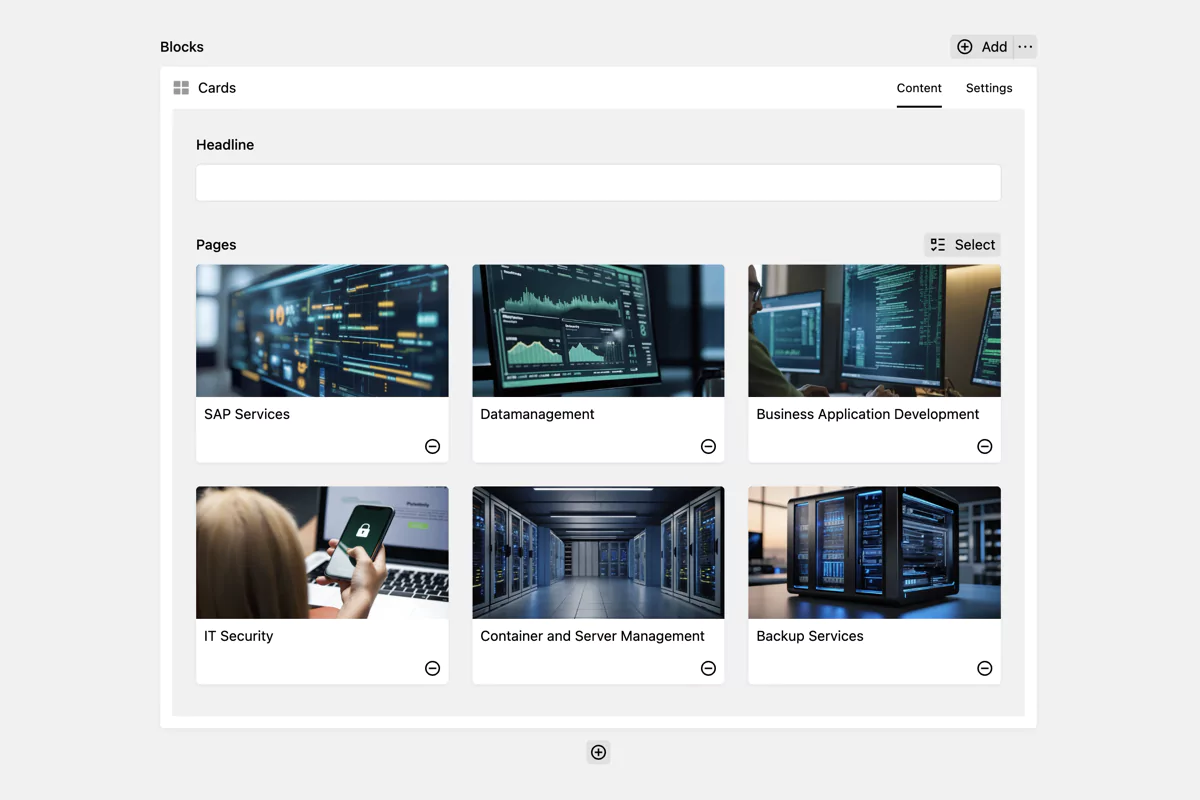
The Blocks Field is configured with a fieldsets option that lists all available blocks. Each block is a blueprint that defines the fields for that block. Here’s how a simple block looks in the Panel:

The block blueprint is stored in site/blueprints/blocks/cards.yml:
name: Cards
preview: fields
wysiwyg: true
icon: grid
tabs:
  content:
    fields:
      headline:
        type: text
      pages:
        extends: fields/pages
  settings: tabs/block-settings
Since most blocks need some kind of settings (like the anchor link, background color or text alignment), I created a block-settings tab that I can extend in every block blueprint.
This file is stored in site/blueprints/tabs/block-settings.yml:
fields:
  anchor:
    type: slug
    before: '#'
    wizard:
      field: headline
      text: Generate from headline
  background:
    extends: fields/color
For this block to be available in the Blocks Field, you need to add its name to the fieldsets option in the blueprint that uses the Blocks Field:
blocks:
  fieldsets:
    - text
    - cards
Automating the fieldsets option
Managing available blocks in the fieldsets option can be tedious if done manually. Because I tend to go totally overboard with the number of available blocks, I wanted to automate this.
With Kirby’s ready config option, it’s surprisingly easy. You can simply read block blueprints directly from the file system:
// site/config/config.php
'ready' => function() {
  $blockBlueprints = Dir::files(kirby()->root('blueprints') . '/blocks');
  $blockBlueprintNames = array_map(function($blockBlueprint) {
    return F::name($blockBlueprint);
  }, $blockBlueprints);

  // Move 'text' block to first position (optional)
  $blockBlueprintNames = array_values(array_filter($blockBlueprintNames, fn($value) => $value !== 'text'));
  array_unshift($blockBlueprintNames, 'text');

  return [
    'blocks' => [
      'fieldsets' => $blockBlueprintNames
    ]
  ];
},
This code:
- Gets all block blueprint files from the
site/blueprints/blocksdirectory - Extracts their names (without the
.ymlextension) - Optionally moves the
textblock to first position - Sets the
blocks.fieldsetsoption to the blueprint names
Now the Blocks Field automatically updates when you add or remove block blueprints.
Kirby CLI command for creating blocks
To make creating new blocks even easier, I made a custom Kirby CLI command. It creates a new block blueprint and the corresponding snippet file.
Put the following code in ~/.kirby/commands/make/block.php:
declare(strict_types=1);

use Kirby\CLI\CLI;

return [
    'description' => 'Creates a new block',
    'args' => [
        'name' => [
            'description' => 'The name of the block',
        ]
    ],
    'command' => static function (CLI $cli): void {
        $kirby = $cli->kirby();
        $name  = $cli->argOrPrompt('name', 'Enter a name for the block:');

        $blueprintFile  = $kirby->root('blueprints') . '/blocks/' . $name . '.yml';
        $snippetFile = $kirby->root('snippets') . '/blocks/' . $name . '.php';

        $cli->make($blueprintFile, Yaml::encode([
            'title'  => ucfirst($name),
            'preview' => 'fields',
            'wysiwyg' => true,
        ]));

        $cli->make($snippetFile, '<!-- {{ title }} -->', [
            'title' => ucfirst($name)
        ]);

        $cli->success('The block has been created');

        exec('code ' . $blueprintFile . ' ' . $snippetFile);
    }
];
After adding this file to your global commands, you can create a new block with kirby make:block in the terminal. The command asks for the block name and creates the blueprint and snippet files.
I already set the preview option to fields and wysiwyg to true by default. This way I don’t have to worry about it when creating a new block. If you want to add more default options, you can easily extend the command.
After creating the block, the command opens the blueprint and snippet files in Visual Studio Code. This way I can immediately start editing the block. Adjust the exec command to your preferred editor.
That’s it
How do you handle modular websites in your Kirby projects? I’m always curious to learn about different approaches. Feel free to share your setup or improvements to this workflow – you can find me on Mastodon.
